Prerequisition
To ensure PAP workflow working properly, three custom fields have to be created.
In this example, we will choose approver from selected project roles. Please don't set 'Approver' custom field show in create/edit screen and don't make it as required.
Steps:
- Add a new workflow
Log in as JIRA administrator
Click cog icon > Issues > workflow
Click 'add workflow' button
2. When user submits a JIRA issue, project roles will be selected as 'Approver'.
Click 'Create'
Click <Result> page and use project roles as 'Approver'.
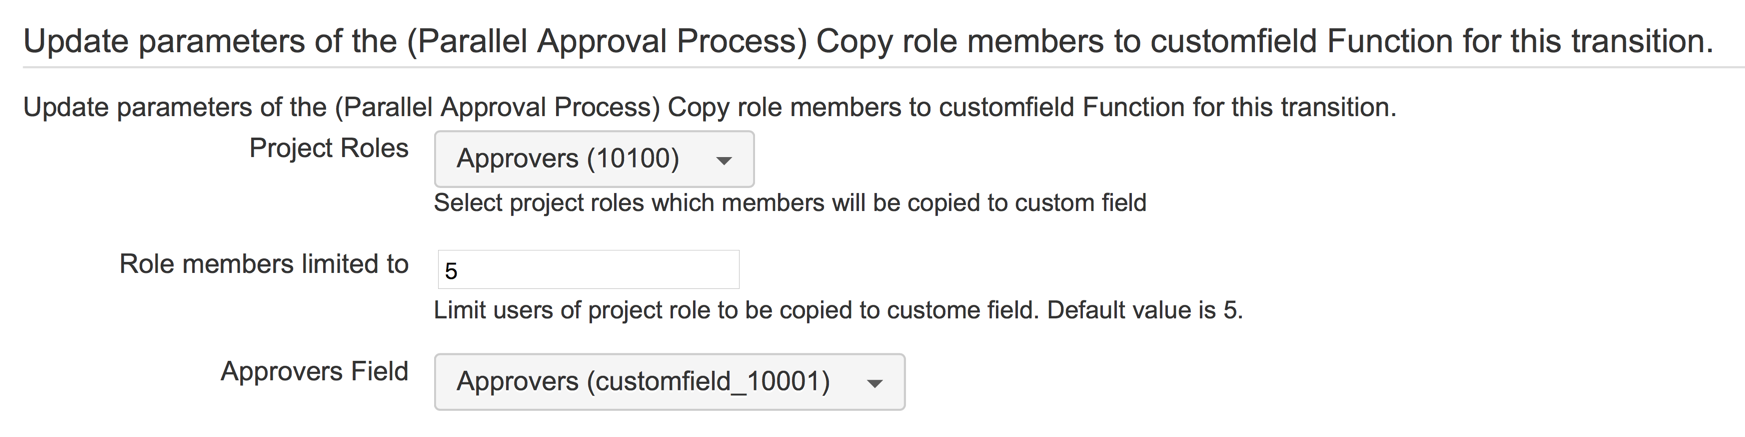
The process can become too complicated if too many approvers are selected. In this page, you can limit total approver number by setting maximum project role number. Default number is 5.
3.Configure PAP workflow
Step: OPEN
Status: To Do
| Transition Action | Target Step | Screen | Conditions | Validations | Post Functions | Remark | |
|---|---|---|---|---|---|---|---|
| Submit | WAITING FOR APPROVE | Workflow Screen | Only Reporter Condition | ||||
| Cancel | DONE | Workflow Screen | Only Reporter Condition | Update Issue Field: Set Resolution = Rejected |
Step:WAITING FOR APPROVE
Status:Waiting for Approval
| Transition Action | Target Step | Screen | Conditions | Validations | Post Functions | Screenshot of Post Function |
|---|---|---|---|---|---|---|
| Agree | WAITING FOR APPROVE | Workflow Screen | (Parallel Approval Process) User in Approvers Field | (Parallel Approval Process) Commnet is required | (Parallel Approval Process) AGREE |  |
| Reject | DONE | Workflow Screen | (Parallel Approval Process) User in Approvers Field | (Parallel Approval Process) Commnet is required | (Parallel Approval Process) REJECT |  |
| Pass (Auto) | DONE | Workflow Screen | (Parallel Approval Process) Hide transition | Update Issue Field: Set Resolution = Done |
Step:DONE
Status:Done